REDCap allows users to schedule when surveys go out to participants and it is very customizable, even down to setting particular schedules for individual participants.
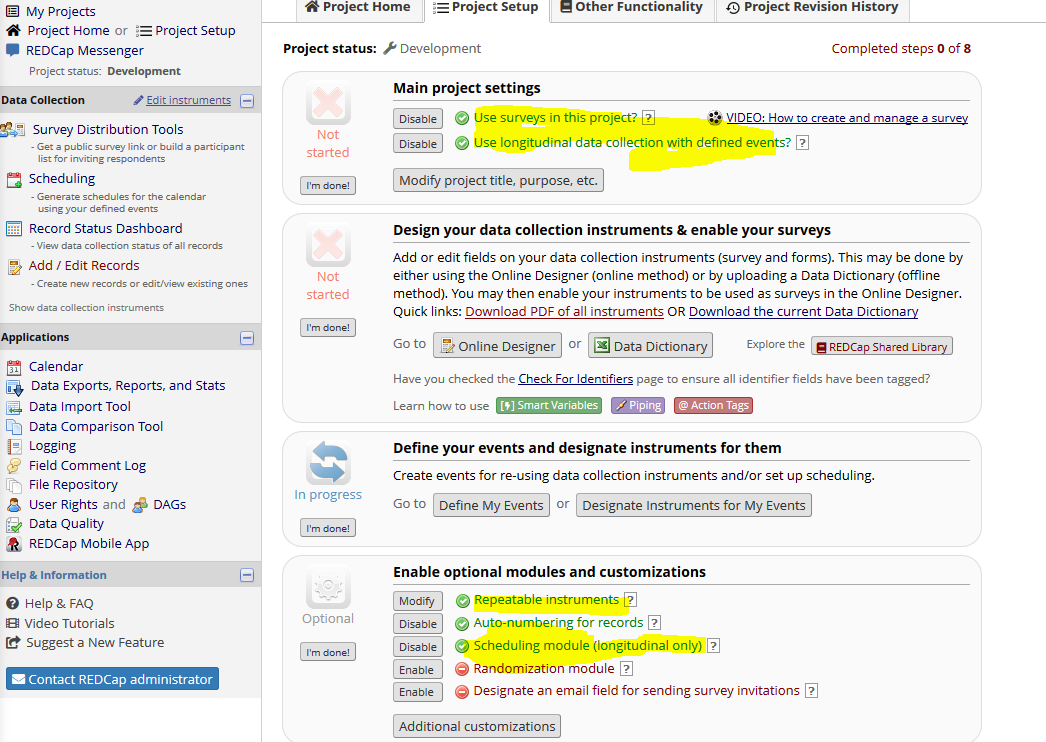
First, you will need to enable a few things in Project Setup:
Use surveys in this project, longitudinal data collection with defined events, repeatable instruments and events, and scheduling module.
(I’ve highlighted them all)
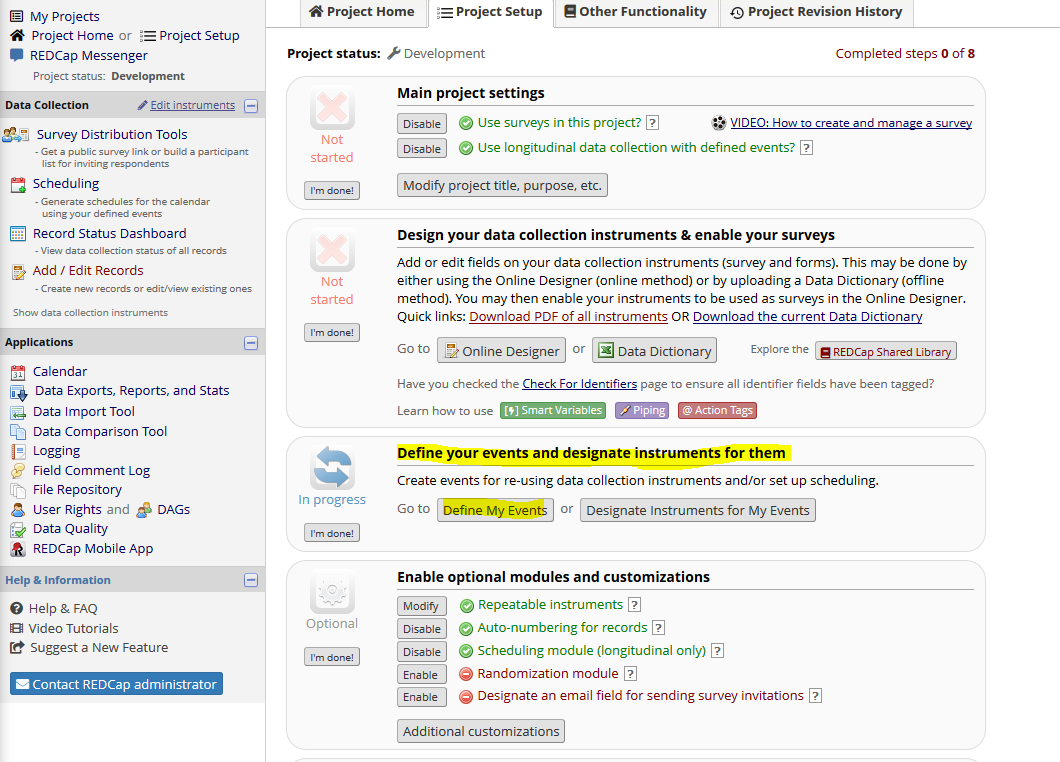
Then you will need to Define My Events, which you can get to from the box in Project Setup that appears when you enable longitudinal data collection with defined events.
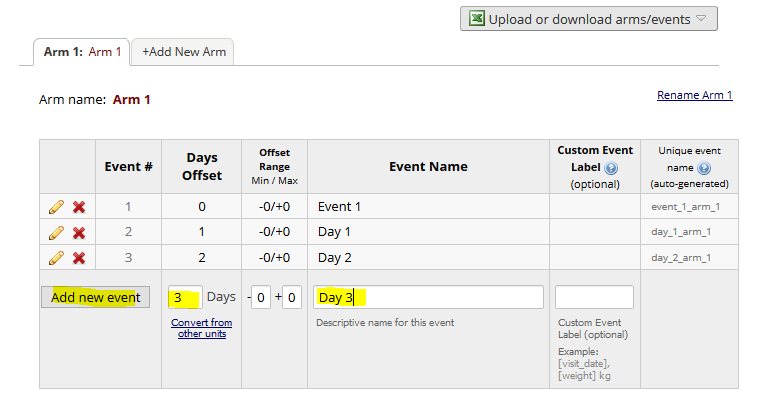
Events are discrete events that will happen in the course of your project, often clinic visits or surveys (as in your case). You create a new event by putting in a name for the event, and an offset value. The name is up to you, I chose Day 1, Day 2, since we’ll be sending this out every day. The offset value is how many days the even is offset from the first event, so I’m offsetting each event by adding one, but you can also modify this later in the scheduling module. You should make an event for each survey you plan on sending out.
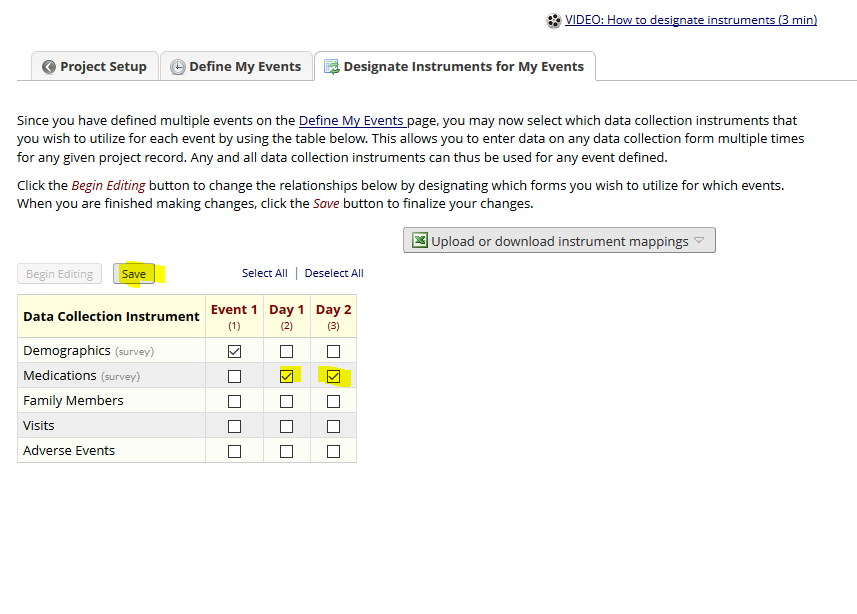
Next we need to define instruments for our events, which is available though the tab at the top of the page.
On this page we need to designate what instruments happen on what events, in our case we want the same instrument on every event. So you click “Begin Editing” and select the correct instrument for Day 1, Day 2, and so on. Since I’m using a test project I have other options, but you will likely only have one or two possible instruments. I am going to use the Demographics instrument to trigger the surveys so I’m designating it as the first event.
Then we need to enable the instruments as surveys. So we will need to go to the Online Designer and click the Enable button next to the instrument we want to use as the survey.
You can modify how the survey looks and acts, and you should take a look at the options, but I am just going to click Save Changes. Back in the Online Designer I can now modify the Automated Invitations for that instrument.
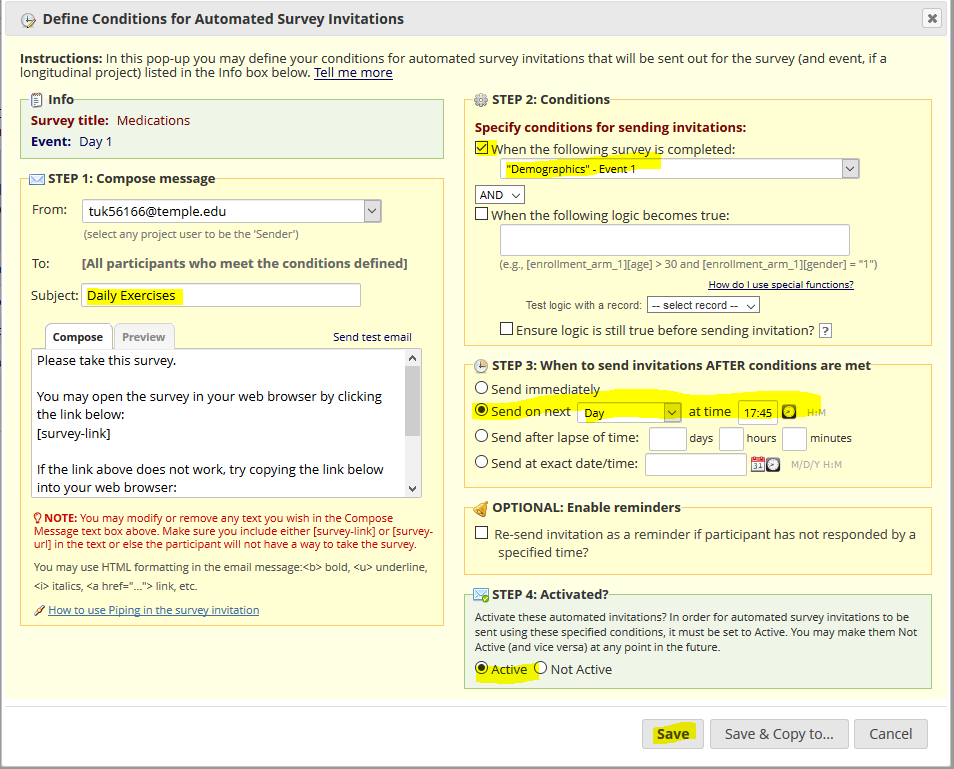
By clicking on that, I can choose how it the invitations will go out on each event. For Day 1, I want it to go out the next day after I fill out the Demographics instrument. So I fill out the subject line, and click on the:
“Specify conditions for sending invitations:
When the following survey is completed:”
Button and choose the Demographics event. This will cause this survey to go out after the demographics instrument is completed. In Step 3 I can choose when to schedule this survey to go out, you can choose a lot of options, but I am putting in the next day, and 5:45 since I want to give them a chance to exercise (you can put in whatever is best). You can also set a reminder email to go out. Finally you need to mark it as active and save it.
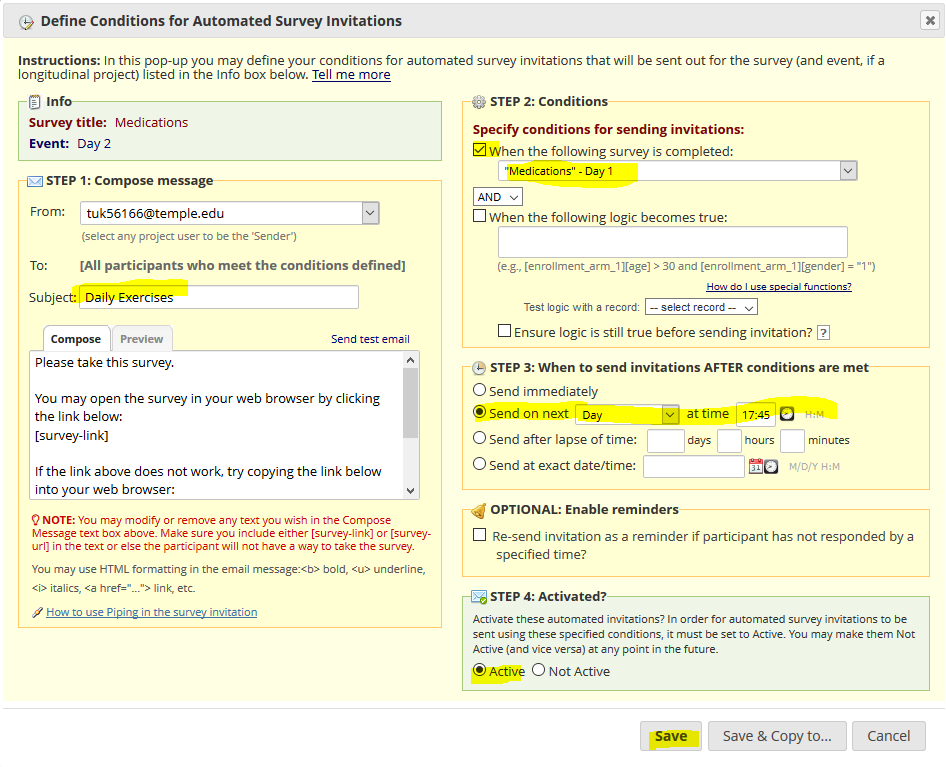
Then you’ll need to do the say for the other Events but instead of the Demographics event being the trigger, ust the previous day of this instrument as the trigger. (You could also trigger it off the demographics event, if you set it to go out 2 days later, and so on.)
If you do this for all the events, you should be set up for it to automatically send out a survey every day, as long as they are completing the previous day’s survey.
![]()
![]()
![]()